

How To Make Smooth Animation In Blender
Quick and smoothen blitheness in Blender
Source File
strafing_run.blend
The result of recording camera movement (Auto Keying) when in walk navigation (WASD) mode:
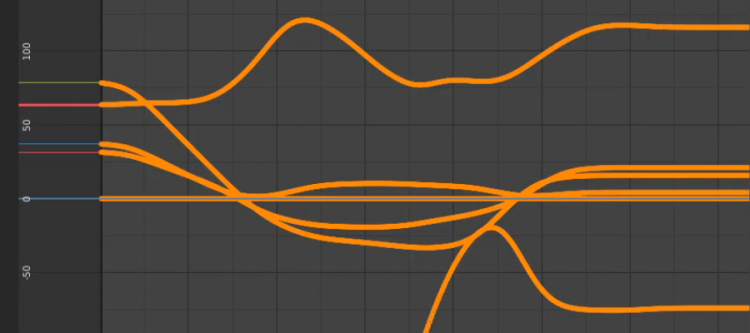
Smoothing using [ALT+O]:
Approximating using Decimate (% allowed change):
Copying camera animation information to an object:
Quick notes
This is a popular learning trajectory for animating objects in Blender:
Goal
"I want to make an animation"
Approach
- Place keyframe at start. Place keyframe at cease. Linear or Bezier. Modifty in Graph Editor.
- Add more than keyframes.
Issues
- Not realistic and life-like.
- No path following.
- No cyberbanking / tilting.
- Calculation rotational keyframes manually to set pitch, roll and yaw is deadening, peculiarly if you decide to movement the object later on.
Approach
- Utilise Curve Modifier.
- Set up a first and end position keyframe.
Bug
- Curve origin needs to exist set at beginning of curve.
- Bend origin and object origin need to sit down at same position.
- It is not necessary to 'employ location', but you should 'apply rotation and scale'.
- Getting the orientation of your object along the curve right is a hurting.
- Using the 'tilt' belongings to edit Curve points is a pain.
- Even though curves use points with Bezier handles, objects tin ofttimes exist seen to change pitch, yaw and scroll abruplty the moment they pass a signal on a curve. Adding more points helps but makes animative tilt difficult.
- If you lot make the curve longer, the object volition move faster. No constant speed.
Arroyo
- Add together a aeroplane shaped into a iii vertex pointer with Curve Modifier.
- Vertex parent an object to the 3 vertices of the 3 vertex arrow.
- Instead of keyframes, ready a single keyframe on the X or Y position.
- In Graph Editor, add together a Modifiers > Generator to the track and then the iii vertex arrow moves at a constant speed contained of the number of points on the bend.
Problem
- Editing keyframes with the animation paused often results in objects in the incorrect place at the wrong time or objects moving at wrong speed when you press 'Play'.
Solution
- You Need TO Offset LIVE RECORDING KEYFRAMES As SHOWN IN VIDEO.
How does it work
Step one – Record moving an object using [Grand]
You can record moving an object using the Move command [G]:
- Add together a cube to the scene.
- Click "Motorcar Keying" circle shaped tape button in Timeline.
- Set up terminate frame to 1000.
- Press Infinite to showtime recording.
- Press [Thousand] to motion the cube.Notice keyframes beingness generated automatically.
Stride ii – Moving a photographic camera using WASD navigation
- [RMB] View > Navigation > Walk navigation and assign SHIFT-F shortcut.
- Press SHIFT-F
- Printing (SHIFT) + WASD to movement the photographic camera fast / irksome every bit if you are in a computer game.
- You tin record this movement the same way equally before past using "Auto Keying" and pressing [Space].
Step 3 – Graph Editor
Do Not Be Agape Of Having Hundreds of Keyframes. Keyframes are your friend. The Graph Editor tin can be used to smoothen, simplify (decimate), cleanup whatever number of keyframes and create uncomplicated graphs (called F-curves).
The Graph editor has some clever features to work with large animation sequences consisting of hundreds of F-keyframes:
Graph Editor – useful keyboard shortcuts
[G] movement a sequence along the timeline (X centrality) or value (Y axis). Values are often degrees or coordinate positions.
[S] to calibration a sequence to deadening down or speed up.
[MMB] Mousemove to pan.
[CTRL+MMB] Mousemove to zoon in on 10 axis (mousemove left <> correct) and Y axis (mousemove up/downwards).
Graph Editor – useful menu options / workflow
This is a useful workflow to manipulate a large number of recorded keyframes.
- Add a keyframe at offset and end frame manually.
- Key > Sample Keyframes to fill in whatever gaps (interpolates betwixt existing keyframes)
- Key > Polish Keys 10 100 or and then.
- Key > Decimate (% allowed change). Prepare a value between 0.0 (= 0% allowed change) and i.0 (= 100% immune change) to approximate the samples into a simplified F-curve. 0.i to 0.five more often than not gives acceptable results.
Tin you transfer a recorded walk navigation way (WASD) photographic camera animation data to objects ?
Yes you can. Simply use copy-paste to copy-paste the keyframes or:
- Select camera
- CTRL / SHIFT select one or more additional objects.
- Press [CTRL-50] and select "animation information".
This is similar to how yous utilise the same cloth to multiple objects. This time, we apply [CTRL+L] to utilise animation information.
Decision
Pros:
+ I can at present work with blitheness tracks that have hundreds of keyframes.
+ Realistic life-similar blitheness.
+ Like shooting fish in a barrel to smooth.
+ Like shooting fish in a barrel to reduce keys using 'Decimate (% allowed change).'
Cons:
– Just two WASD speeds (fast or irksome). Speed transitions can be smoothed out though, which is good.
– Speed may not exist correct. Scaling all keyframs forth Ten axis may fix this.
– No banking / tilting.
– Smoothing / decimating F-curves may cause the object to move closer to other objects in the scene unintentially.
– Animation takes a lot of time to get right. Is just how information technology is.
Banking / tilting
You can record this on a dissever track on a dummy object afterward and transfer keyframes. You lot can also simply move a rotation value input field slider or printing [R] [X] or [Y] to rotate an object in a unmarried direction whilst live recording (= Auto Keying enabled during playback).
Source: https://coeleveld.com/quick-and-smooth-animation-in-blender/
Posted by: floressirche.blogspot.com
0 Response to "How To Make Smooth Animation In Blender"
Post a Comment